
Update (11/19/2023): OpenAI recently enforced restrictions of using names which could potentially have trademarks, so I could not use YouTubeGPT for this work any more. The new name of this GPT is TubeSummarizer, and all the functions are the same as YouTubeGPT as described in this article. The Link to TubeSummarizer: https://chat.openai.com/g/g-FfwABJqAY-tubesummarizer
Function calling is the critical feature that connects LLM’s chatting capability to real actions in our digital world. I believe this is THE game changer for the AI revolution, where people can translate the lowered cognitive cost into lower operational cost. With function calling, we finally get something that can not only understand, but also execute.
GPTs is a new product released by OpenAI, which allows developers to build custom chat bot with specific prompts and private knowledge library. It also integrates OpenAI’s function calling capability. In fact, each GPT is an agent that understands the context of the conversation and performs appropriate actions when needed. In this article, I will explain how I built the YouTubeGPT with function calling. This GPT will extract transcript from a YouTube video and summarize it.
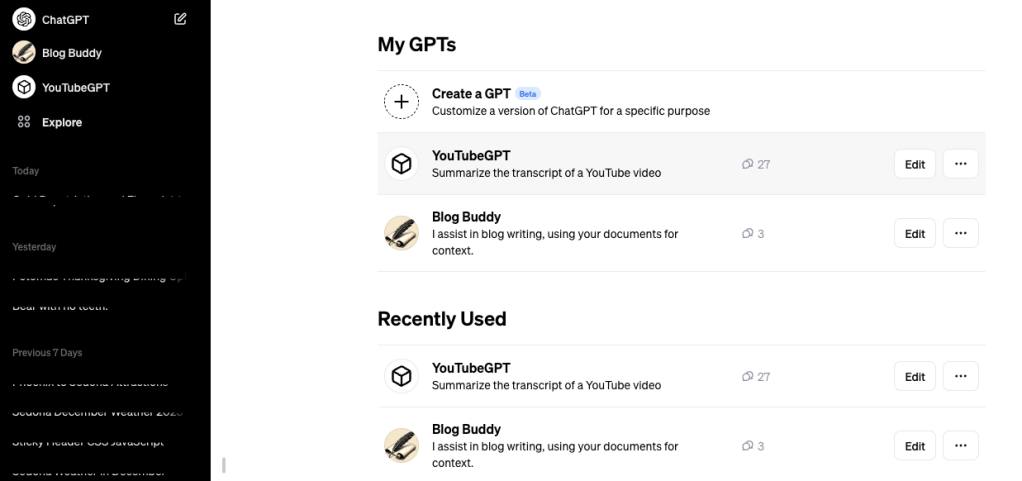
If you are a Plus member, when you log into your home page on ChatGPT, you will notice an “Explore” icon under the ChatGPT icon. Clicking it will direct you to OpenAI’s new “My GPTs” page, where you can browse some pre-built GPTs by OpanAI, or choose to create your own.
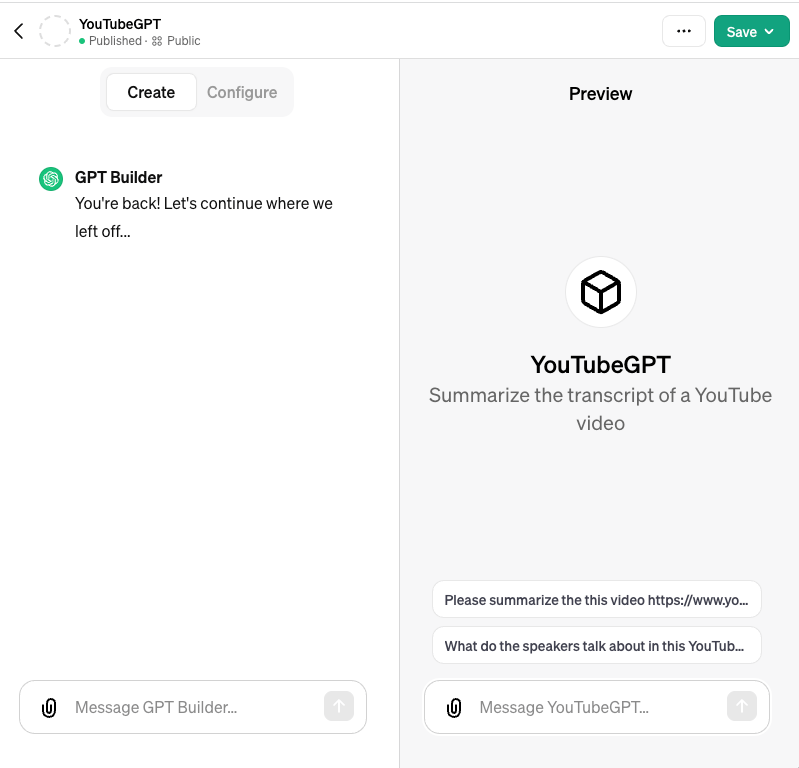
Clicking “Create a GPT” will open the edit page, where you have two options: Create or Config. “Create” means you talk to the GPT Builder, which is the a chat bot on the left, and you have conversation with it about the idea of your GPT, and it will automatically create a GPT for you. In the backend, it essentially creates a proper logo and a proper prompt for your GPT.
But as a developer, I prefer the “Configure” option, which gives me more control on the prompt and other things. Particularly, if we wan to use the function calling feature, we have to take this option. As we can see, in the “Configure” page, we need to set up several options.
- Name and Description: very straightforward.
- Instructions: We give the prompt here.
- Conversation starters,: example user inputs to help user understand what kinds of input the GPT expects.
- “Upload files” button: this allows you to upload documents to create a private knowledge library, with which your GPT can consult. I don’t need it in this case.
- Capabilities/Web Browsing: turn it on if we want our GPT can search Bing for more information during the conversation
- Capabilities/DALL-E Image Generation: turn it on if we want our GPT can draw images
- Capabilities/Code Interpreter: turn it on if we want our GPT can write and run code
- Actions: this is the place to configure the function calling
- Additional settings: currently there is only one, whether you allow OpenAI use the chat data to train its model.
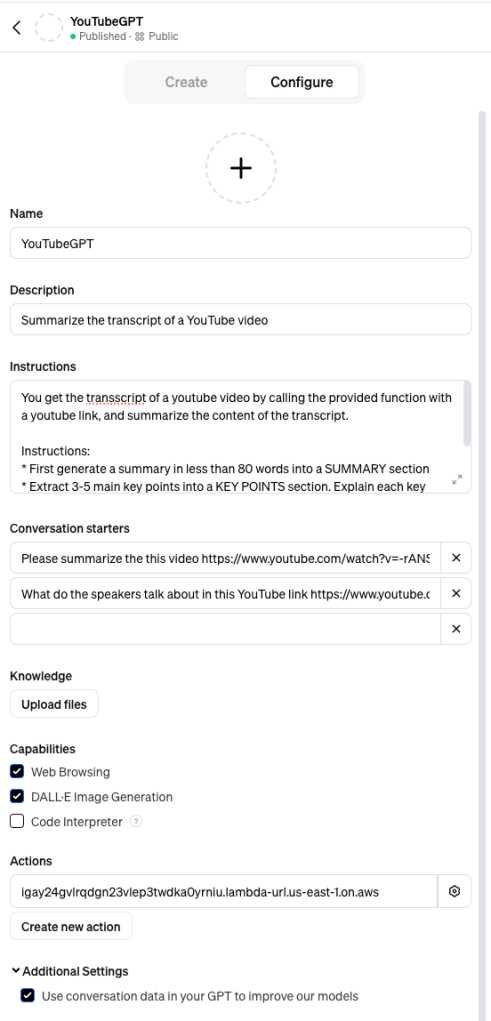
The most important configure in this page is the prompt in the Instructions input box. Here is my prompt:
You get the transcript of a youtube video by calling the provided function with a youtube link, and summarize the content of the transcript.

Instructions:
* First generate a summary in less than 80 words into a SUMMARY section
* Extract 3-5 main key points into a KEY POINTS section. Explain each key points with more details, using one separate paragraph less than 100 words for each key point
* At last, generate a SUMMARY section with conclusions, recommendations, and further reading resources. Less than 100 words.
Now, let’s go to the function calling part by clicking the “Create new action” button. This will take us to the following page:
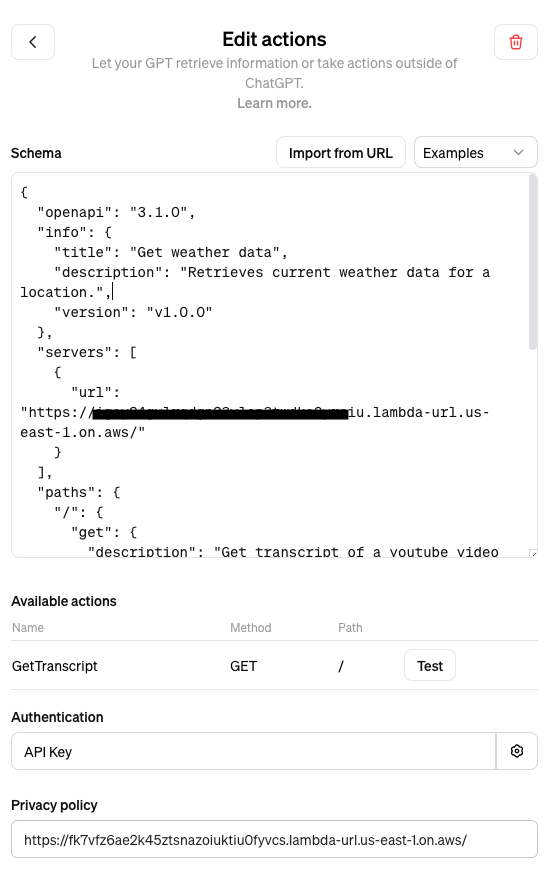
To define a function for GPT to call, we need to first to specify the function schema. I don’t want to explain the detail of the schema, but if you are interested to learn more, searching “OpenAI schema” will point you to the right places. Here is my schema with the part of the domain name is omitted.
{
  "openapi": "3.1.0",
  "info": {
    "title": "YouTubeGPT Web APIs",
    "description": "Web APIs to support YouTubeGPT.",
    "version": "v1.0.0"
  },
  "servers": [
    {
      "url": "https://<part of the domain name>.lambda-url.us-east-1.on.aws/"
    }
  ],
  "paths": {
    "/": {
      "get": {
        "description": "Get transcript of a youtube video by its url",
        "operationId": "GetTranscript",
        "parameters": [
          {
            "name": "url",
            "in": "query",
            "description": "The url of youtube video",
            "required": true,
            "schema": {
              "type": "string"
            }
          }
        ],
        "deprecated": false
      }
    }
  },
  "components": {
    "schemas": {}
  }
}
After you input the schema, if everything is correct, the configure page will automatically recognize the Name, Method, and Path parameters of the Web API.
But where do we actually implement the API for the function calling? Normally, you are expected to implement them on a web server of your business. But thank serverless cloud computing, now everyone can build Web APIs without actually running a web server.
In the case of YouTubeGPT, what I need is a web endpoint which return a video’s transcript given its YouTube link. I implemented this API with an AWS Lambda, leveraging the python library youtube_transcript_api. This is actually the main part of the work which took most of my development time. However, because building Lambda is not the focus of what we are discussing here, I’d skip this process.
Next, Authentication. You can choose to do it without authentication. But for me working in the Cybersecurity field, it is just simply not acceptable. So I implemented an authentication using the API key approach. Of course, I have to share the key with OpenAI.
At last, OpenAI REQUIRES I have a privacy policy that is publicly accessible on the Internet. Another Lambda solved the problem.
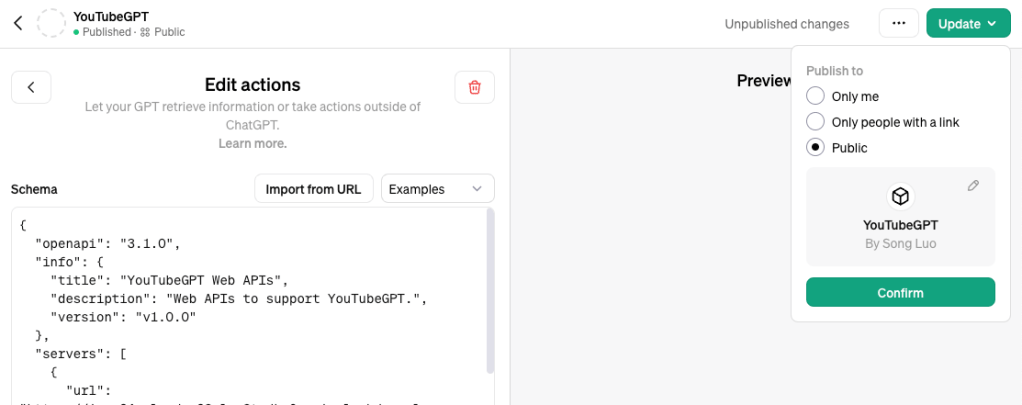
After you are done with above configurations, finally you can publish by clicking the green “Update” button on the top right corner of the page. You can choose to publish to yourself, to people with link, or to the whole Internet!

Leave a comment